These are a great homemade alternative to packaged granola bars. It's nice to know all of the ingredients and get the kids involved in making them. They store really well and the kids loved them! I still occasionally buy store bought bars but these are so tasty I think we'll be having them more often.
Recipe: (makes 12-18 bars)
Ingredients:
1/4 cup Coconut Oil
2 Tablespoons brown sugar
1/2 cup honey
1/2 cup creamy peanut butter
1/8 teaspoon salt
1/2 teaspoon vanilla
2 teaspoons Chia Seeds
2 teaspoons water
1/2 cup Unsweetened Shredded Coconut
2 cups oats
1 3/4 cups Koala Crisp Cereal
1/4 cup dried fruit, chopped
Directions:
1. In a saucepan over medium heat, combine coconut oil, brown sugar, honey, peanut butter, salt and vanilla and stir occasionally until well combined and heated through, about 3-5 minutes.
2. In a small dish combine chia seeds with 2 teaspoons of water, let soak briefly
3. In a large mixing bowl combine soaked Chia seeds, coconut, oats, crisp cereal and dried fruit, let the kids measure and mix ingredients.
4. Have an adult pour the warm peanut butter and honey mixture over the top of the dry ingredients and stir gently to coat. If mixture seems too wet, add another 1/4 cup of oats.
5. Spread mixture on a Silpat-lined, rimmed baking sheet or glass pan. Using the back of a spatula, spread and flatten mixture trying to keep it uniform in thickness. Place pan in the refrigerator to chill.
6. Once chilled through, slice with a butter knife into bars or squares. Store in an airtight container for up to 1 week.
*this post includes affiliate links
...click here for the recipe!
So everything is better with a little chocolate right? These are the cocoa version of my
lemon coco-roons and they are super tasty as well. When you want a sugar-free treat give these a try! Enjoy!
Recipe (Makes 8-10)
Ingredients:
1/3 cup finely shredded, Organic unsweeted coconut
2 tbsp Organic Virgin Coconut Oil
3 Tablespoons Organic, Blanched Almond Flour
2 tbsp Creamy Almond Butter
1 Tablespoon Organic coconut sugar
3 teaspoons cocoa powder
Directions:
1. Combine all ingredients in a bowl and mix well. Using a 1/2 tablespoon measuring spoon scoop out mixture and form into balls. Set onto a Silpat lined baking sheet then refrigerate for 1 hour and enjoy. Store in an airtight container in the fridge.
...click here for the recipe!
We had company over for dinner last week and I made brownies for dessert. I wanted to be sure my hubby had some kind of dessert as well. These turned out more like a chocolate bread than a super sweet brownie, which is great for those that don't like a lot of sweet. They have a good texture and a great cocoa flavor. If you are okay with chocolate chips, I think a few sprinkled on top of the batter before baking would really be a nice sweet touch. The plate was empty by the next day and the kids enjoyed them too.
Recipe (makes about 9-12 squares)
Ingredients:
1 cup Organic Creamy Almond Butter
1/3 cup Organic Agave Nectar
1 egg
1 teaspoon good quality Vanilla
1/3 cup Cocoa Powder
1/2 teaspoon baking powder
Directions:
1. Preheat oven to 350'F. In a mixing bowl combine wet ingredients; almond butter, agave, egg and vanilla.
2. Slowly add the dry ingredients to the wet, stir to combine.
3. Bake in a greased 8"x8" glass baking dish at 350'F for 20-22 minutes until set and sides begin to pull away form the glass..
4. Let cool then slice into squares and serve.
*this post contains affiliate links
...click here for the recipe!
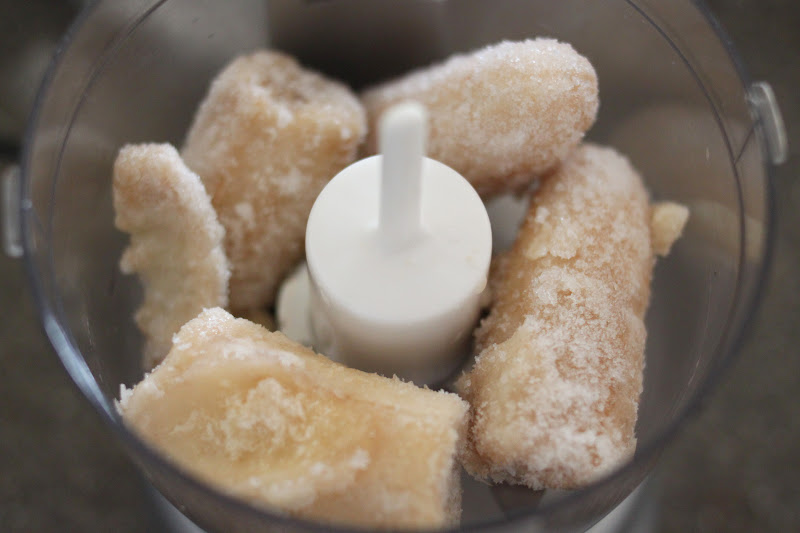
Well it seems a little silly to say that this is gluten free or even to call it a "recipe" because what I'm about to share with you has only one ingredient...bananas. Yep, that's it, just bananas. Are you ready for the most tasty, creamy, rich, frozen treat ever? This is my new favorite, especially in this summer heat.
After the birth of our third son, our friends showered us with blessings in the form of meals! One friend brought chocolate dipped frozen banana bites with her meal and they were fabulous. I was amazed at how the banana tasted just like vanilla ice cream and wasn't overly banana-y at all...delicious! This is the same way! I like my banana soft serve plain so I can savor the creamy, rich, sweetness, but I'm quite sure that some chocolate chips or granola as a topping would be amazing too. Enjoy!
Recipe: (about 1 banana per person)
Ingredients:
bananas
toppings optional
Directions:
1. Peel bananas, cut them into thirds {so they're easier to process} and freeze in a resealable plastic bag or freezer safe glassware
2. Once bananas are frozen SOLID, place them in a food processor
3. Pulse the processor a few times, scrap down the sides. Continue processing for about 2-4 minutes, scrapping down the sides as needed. I used my Mini Cuisinart for less clean up.
4. Watch and you'll see when the bananas break down and start to puree. Once it's smooth let it go for another few seconds to get it really whipped and creamy. Don't over mix. It should still be thick, here you can see it can hold my metal spoon upright! Enjoy your guilt-free satisfying treat!
...click here for the recipe!
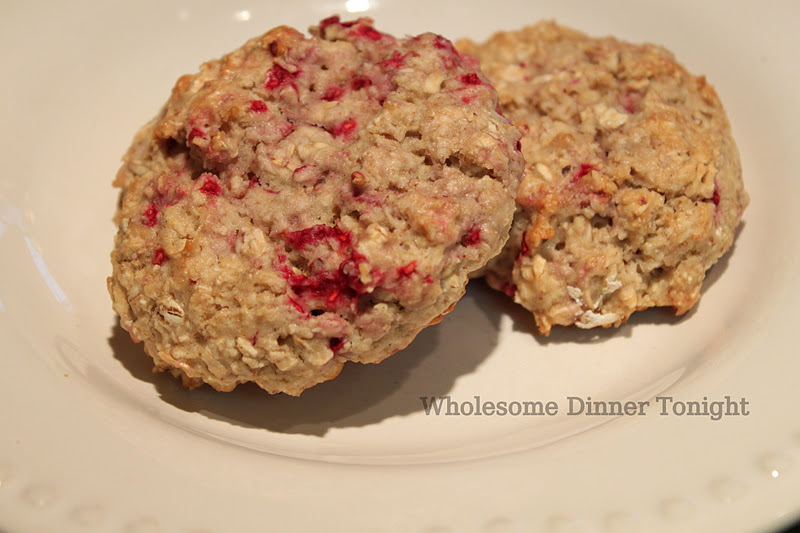
Happy New Year! For a special Christmas morning breakfast my hubby made these delicious scones. We affectionately call them "sconies" in our house since they are alittle smaller than the average scone. The addition of tangy raspberries was fantastic! These have another great surprise ingredient...pureed white beans. Dried white beans cooked in the slow cooker then pureed are a wonderful addition to just about any baked good, adding fiber, antioxidants, lowering the fat and adding great texture to gluten free recipes. You can use the bean puree 1:1 to replace half the fat in most recipes. Give it a try! Enjoy!
Recipe: (makes 12 scones)
Ingredients:
2 tablespoons firm unsalted butter
1/2 cup sugar
1 egg
1 teaspoon vanilla
2/3 cup pureed white beans (pureed in blender until smooth)
2 cups old fashion oatmeal
1 cup Pamala's Gluten Free all purpose flour
1/4 teaspoon salt
1/3-1/2 cup frozen organic raspberries
Directions:
1. Pre-heat oven to 350'F. Cream the butter and sugar together with an electric mixer on medium-high speed for ~1 minute. Add egg, vanilla, and bean puree and mix on med-low speed for 2 minutes.
2. In a separate bowl whisk together the dry ingredients: oats, salt, and Pamela's flour.
3. With mixer on low speed add the dry ingredients, slowly by the cup, into the wet. Once combined add the raspberries and mix only enough to combine.
4. Using an ice cream scoop, scoop onto a cookie sheet lined with parchment paper. Bake for 20 minutes at 350'F until slightly golden and set.
White Bean Puree Recipe: (yields about 5 cups)
Directions:
1. Bring a large pot of water to a boil. Add 2 1/2 cups of dried white beans and flash boil them for 2-3 minutes. Remove from the heat, drain and rinse well.
2. Place drained and rinsed beans in slow cooker and cover with 6 cups of water, cook on high setting for 4 hrs.
3. Allow cooked beans to cool slightly. Blend beans in a blender until smooth. Bean puree can be stored in fridge for up to 1 week or freeze them in ice cube trays (once frozen pop out cubes into a resealable plastic bag and they should keep for a few months)
Pureed beans after firming up in the fridge
 ...click here for the recipe!
It's been awhile since we've had banana bread so I was excited that my hubby wanted to make some. He came up with this recipe and you'd never guess it's gluten free and dairy free! It was so moist and dense and flavorful and the whole loaf was eaten in one day, yum! You may also like to try our
Low Fat banana bread or our
Low sugar, Vegan banana bread. Enjoy!
Recipe: (makes one loaf, 10-12 slices)
Ingredients:
{dry ingredients}
3/4 cup white rice flour
3/4 cup tapioca flour
1 cup sorghum flour
1/2 cup millet flour
1 Tablespoon xanthan gum
1/2 teaspoon baking soda
1-1/2 teaspoon baking powder
1 teaspoon salt
{wet ingredients}
3 ripe bananas, peeled and mashed
1-1/2 teaspoons vanilla
3 Tablespoons unsalted butter, softened (or use 2 Tablespoons of vegetable oil for dairy free)
1 1/3 cups oat milk
3/4 cup sugar
2 eggs
extras: 1 cup walnuts (optional)
Directions:
1. Pre-heat oven to 350'F.
2. Whisk dry ingredients together in a large bowl. In a separate bowl or stand mixer, beat wet ingredients together until well combined.
3. Slowly (by the 1/2 cup) add the dry ingredients into the wet with your mixer on low speed.
4. Gently fold in walnuts by hand with a spoon. Pour the batter into a greased loaf pan (about 9"x5" size), or use a Stoneware loaf pan like us, then no cooking spray is needed. Bake at 350'F for 60-70 minutes until it reaches an internal temperature of 170'-200'F and a toothpick inserted in the center comes out clean. Let cool for 5 minutes and then enjoy.
...click here for the recipe!
We have been enjoying this fall weather so much! This is my favorite time of year to cook. Sounds silly but I love to make soups, casseroles and generally warm and comforting dinners when it's chilly out. This week we had an old favorite,
chicken enchiladas, but mixed it up with corn tortillas, yummo! We also had
taco salad,
wild rice stuffed acorn squash,
tamale pie and our tasty
pumpkin chili! This week I'm going to try out a couple new dinner recipes, if they turn out, I'll be sure to share. What yummy dinners have you had lately?
We also love our sweets around here. When I showed my hubby a picture of some ginger snap cookies online he said, "those look awesome!". I decided to set out to come up with a gluten free version with a fall twist. I enlisted my husband's help since he's our resident expert on gluten free baking. Together we came up with this recipe. Ginger snaps have such a great warm smokey flavor from the molasses and ginger and our addition of fresh pureed pumpkin gave them a wonderful fall flavor and an extra fluffy chewiness. This recipe makes a lot of cookies, which is good because they won't last long. Enjoy!
Recipe: (makes 34-36 cookies)
Ingredients:
1/4 cup butter, softened
1 cup sugar, plus some for garnish
1 egg
1/4 cup molasses
1 teaspoon good quality vanilla extract
3/4 cup pumpkin puree (we used fresh roasted pumpkin using this method, or you can use canned, just be sure it's plain pumpkin puree)
4 cups Pamela's Baking and Pancake Mix
1 1/2 teaspoons ground ginger
1/2 teaspoon ground all spice
Directions:
1. Cream together the sugar and butter with an electric mixer. Add in egg, molasses, vanilla and the pumpkin and mix until well incorporated.
2. Slowly, one 1/2 cup at a time add in the flour to the mixing bowl and continue to mix until well combined. Add in the ginger and all spice and mix another few seconds to incorporate.
3. Refrigerate the dough for 30 minutes to 1 hour. Using a cookie scoop, scoop dough onto a cool cookie sheet lined with parchment paper and bake in a 350'F oven for 14-16 minutes, rotating trays halfway through, until cookies are crackled on top and have a slight give to the touch. Remove cookies from the baking sheets to wire racks to cool.
...click here for the recipe!
My hubby made these tasty little muffins for breakfast and they were a treat! I especially love the mini muffin size (I can eat more that way). These are a delicious gluten free alternative to our other
Blueberry Muffin recipe. The crispy streusel topping is my favorite part, yummy. Enjoy!
Recipe: (Makes 48 mini muffins or 24 standard muffins)
Wet Ingredients:
2 eggs
1 1/4 cup Gluten Free oat milk (you can substitute with any milk or milk substitute)
1/2 banana, smashed (slightly green banana works best)
Dry Ingredients:
1 1/4 cup All Purpose Gluten Free Flour
1 cup sorghum
1/4 cup almond flour
1/2 cup sugar
2 1/4 teaspoon baking powder
1/4 teaspoon salt
1 1/4 teaspoon xantham gum
1 cup frozen blueberries
Topping:
1/4 cup Pamela's Baking and Pancake Mix flour
1/4 cup brown sugar
2 tbsp unsalted butter
1/4 tsp ground cinnamon
Directions:
1. Preheat oven to 375F'. In a large bowl, whisk all dry ingredients together. In a separate bowl whisk all the wet ingredients together until well combined.
2. Pour wet ingredients into dry ingredients and stir until thoroughly combined. Gently fold in frozen blueberries.
3. In a small bowl combine topping ingredients together and cut in cold butter using a pastry cutter or two forks
4. Scoop batter into a muffin tin coated with cooking spray, fill cups 3/4 full, sprinkle topping evenly over all the muffins. Bake at 375F' for 15 minutes or until a toothpick inserted in the center of a muffin comes out clean. (Increase bake time to 20-25 minutes if preparing standard size muffins)
...click here for the recipe!
Are you ready for the best chocolaty, delectable, light and cakey gluten free brownies ever? My amazing hubby came up with this "from scratch" recipe and these are delicious! Have you ever tried adding black beans to brownies? We've tried it a few times before and I was never a big fan of the beanie taste. By blending the beans with the wet ingredients in a blender and using good quality chocolate the "bean" flavor is really undetectable. I'm sure if you don't reveal the secret ingredient no one would ever guess they were enjoying the added fiber and protein of black beans in their dessert. If you are wanting a sweet chocolaty treat these should be next on your list to try. Enjoy!
Recipe: (makes about 9 brownies)
Ingredients:
3 Tablespoons butter, melted
3 eggs
1 1/2 teaspoons good quality vanilla extract
1/4 cup chocolate flavored Rice Dream rice milk, may also substitute milk or any other milk substitute
1 (14oz) can black beans, drained and rinsed
1/2 cup Ghirardelli premium unsweetened cocoa powder
1/2 cup Gluten Free flour (we used the Gluten Free Pantry brand all purpose Gluten Free flour)
1/2 teaspoon baking powder
1 cup sugar
1/8 teaspoon salt
1/4 cup good quality semi sweet chocolate chips (we used Guittard)
Directions:
1. In a blender add melted butter, 3 eggs, vanilla extract, rice milk and black beans (drained and rinsed), blend until well combined and smooth.
2. In a large bowl whisk together the dry ingredients; cocoa powder, GF flour, baking powder, sugar and salt until combined.
3. Add the liquids from the blender to the dry ingredients in the bowl and stir until well combined.
4. Spray an 8x8 glass baking dish with cooking spray and pour batter in evenly. Sprinkle chocolate chips on top and bake in a 350'F oven for 24-28 minutes until a toothpick inserted in the center comes out clean.
...click here for the recipe!
My hubby created another awesome cookie recipe that got some rave reviews. These cookies have a moist cake-like texture and great flavor all while being gluten free. These aren't your ordinary chocolate chip oatmeal cookies. The sorghum and millet flours offer a great subtle sweetness and nuttiness and an unripe banana (bright yellow with a little green still) adds a light and moist texture without the fat. Hulled millet is not just for birds. It's a healthy, easily digested whole grain that's high in protein and fiber and adds a great nutty crunch. These are tasty, you may need to make two batches. Enjoy!

Recipe: (makes 28-30 cookies)
Dry ingredients:
1/4 cup millet flour
1/4 cup hulled millet
1 cup sorghum flour
1/2 cup tapioca flour
2 1/2 cup quick-cook oats (not instant)
1 tsp xanthan gum
1 tsp baking powder
1/2 tsp salt
1/2 tsp baking soda
3/4 tsp ground cinnamon
1/2 tsp ground nutmeg
1/2 cup chocolate chips
Wet ingredients:
1/4 cup butter (room temperature)
1 banana (not yet ripe) *a very ripe banana will impart more banana flavor and result in a less fluffy cookie
1-1/2 cup brown sugar (loosely packed)
2 eggs
1 tsp vanilla extract
Directions:
1. Preheat oven to 350'F. In a electric mixer, cream butter, banana and sugar together on medium speed for 1-2 minutes. At medium-low speed add eggs one at a time then add the vanilla.
2. In a separate bowl whisk dry ingredients together, except chocolate chips. With your mixer on low speed add the dry ingredients to the wet ingredients slowly in 3 parts allowing each part to be fully combined before adding the next. Lastly fold in the chocolate chips.
3. Using a small cookie scoop or tablespoon, spoon dough onto a baking sheet lined with parchment paper, space at least 2 inches apart. Bake at 350'F for 12-14 minutes or until slightly brown on top. Remove, let cool and firm up on the baking sheet.
...click here for the recipe!
My hubby has been baking again! Our little 4 year old guy had to stay home sick from Preschool today, which was a real bummer because today was "bring your Daddy to preschool day". Boo. The dads were invited to go and have donuts with their preschooler. My hubby is so great, he hung out at home alittle later than normal since he had planned on going to the school and he and our big boy made these muffins together, just the two of them, melt my heart. It was sad to miss school but special Daddy time still happened.
Don't be deterred by their color, these muffins have buckwheat flour in them and that makes them turn out dark but still very tasty! They are hearty and still have the perfect balance of sweetness and moisture thanks to the raisins. I love the clever and delicious addition of applesauce, which is a great low-fat alternative. These are a fun, healthy and gluten free treat. Enjoy!
Recipe: (makes 30-34 mini muffins or 14-18 regular sized muffins*)
Ingredients:
1 1/2 cups organic buckwheat flour
1 cup sorghum flour
1/2 cup tapioca flour
1/2 cup brown sugar
1 1/2 teaspoons baking powder
1 teaspoon baking soda
3/4 teaspoon salt
2 teaspoons cinnamon
1/4 teaspoon all spice
1/2 teaspoon ground ginger
1 egg
2 cups apple sauce
1/4 cup canola oil
2 teaspoons vanilla extract
1/2 cup golden raisins, soaked in warm water for 5-10 minutes to plump
1 cup finely grated carrot (~2 medium carrots)
Directions:
1. Preheat oven to 375'F. In a large bowl combine all the dry ingredients buckwheat flour through ground ginger, whisk to combine.
2. In a separate bowl, mix together the egg, oil, vanilla, raisins and carrots. Pour the wet ingredients into the dry ingredients and stir until well combined. Scoop using a small ice cream scoop into a muffin tin coated with cooking spray.
3. Bake at 375'F for 12 minutes or until a toothpick inserted in center of muffin comes out clean.
*You will need to increase the baking time to 20-25 minutes if using a regular sized muffin tin or until a toothpick inserted in the center of the muffins comes out clean.
...click here for the recipe!
Well you may have noticed that I have neglected this little food blog of ours over the past two months. We are thrilled to be pregnant with our third child and with that has come some pretty severe morning sickness (more like all day sickness). Anyway, I will blog when I can and hopefully be back up soon.
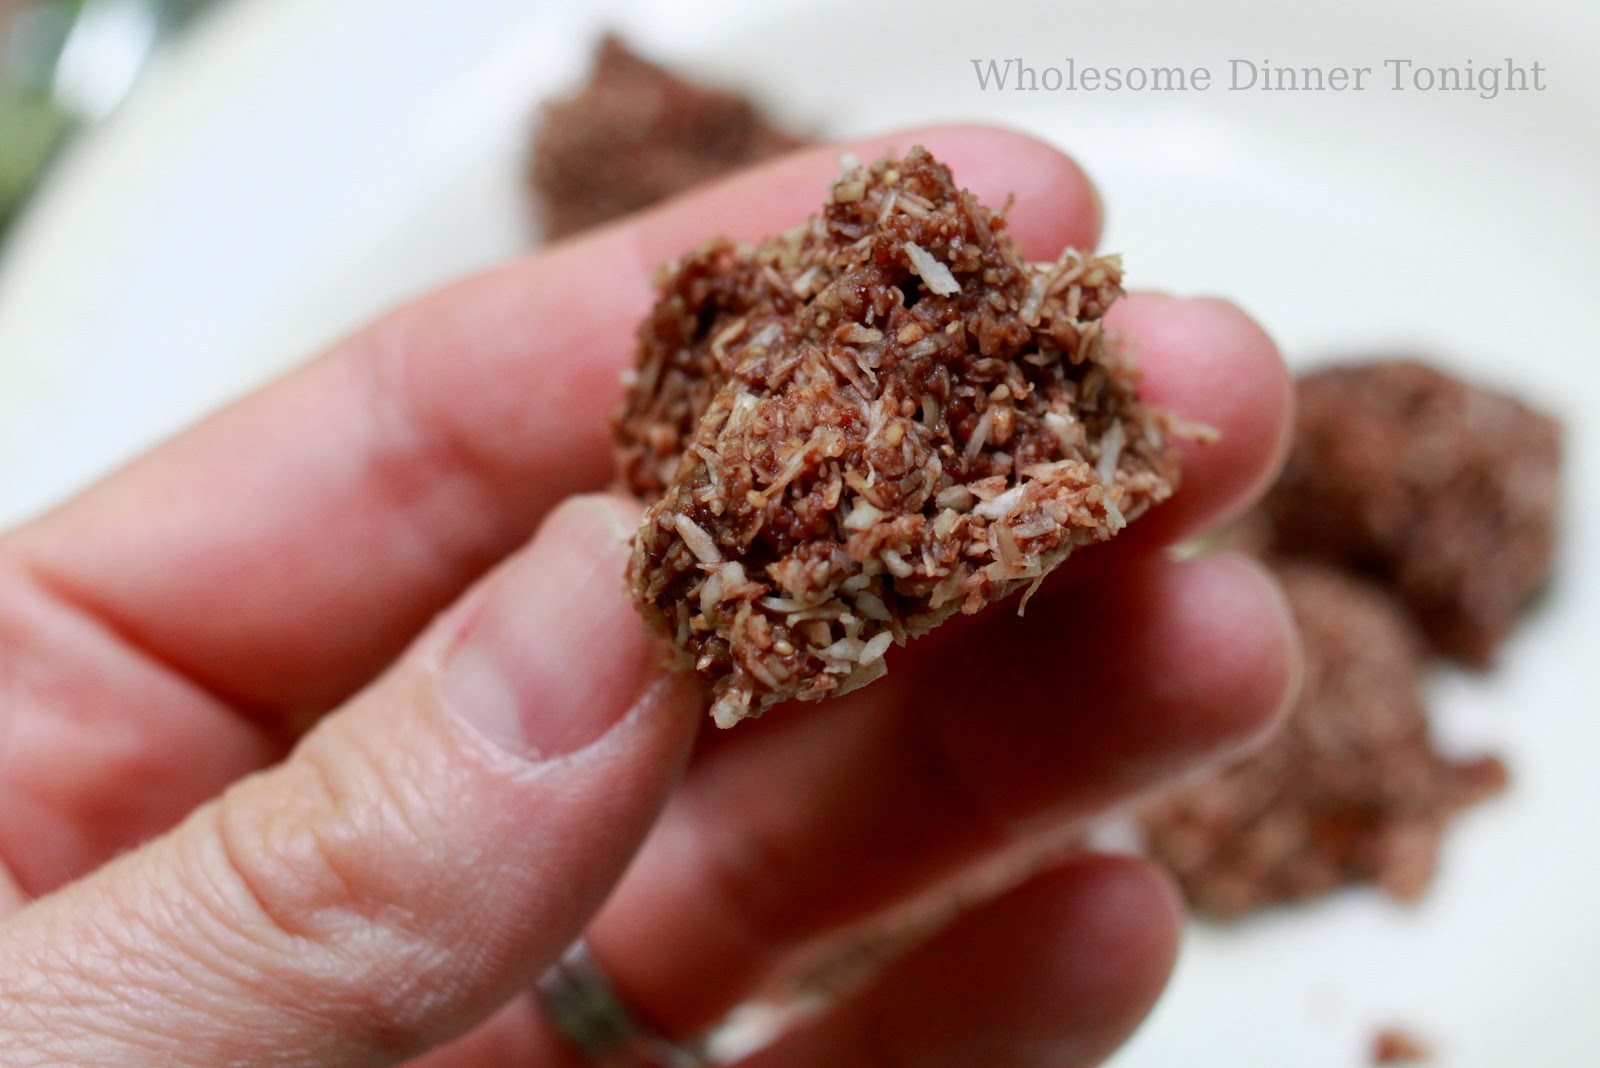
My sweet hubby made these cookies after I mentioned that they sounded good. What a man, and so so helpful while I've been sick! They were delicious. Enjoy!
Recipe: (Makes 12 cookies)
Ingredients:
2 egg whites
2 tablespoons honey
1/2 teaspoon vanilla
2-1/2 cups (loosely packed) shredded, sweetened coconut*
2 tablespoons Pamela's Gluten Free baking mix (or 2 tablespoons of All Purpose flour)
Directions:
1. Preheat oven to 300'F. Mix the egg whites, honey and vanilla together in a bowl with a fork.
2. To the wet mixture, add the coconut and GF baking mix (or AP flour if you're using that), stir to combine.
3. Using a small cookie scoop (or two spoons) place on a cookie sheet lined with parchment paper.
4. Bake at 300'F for 20-25 min. Cookies should be well browned on the bottom and tops but still be a little soft to the touch.
*Edited to add: be sure to use sweetened, shredded coconut that is intended for baking, such as Baker's brand
...click here for the recipe!
My hubby has been baking again! This time he made some delicious oatmeal cookies with a hint of banana. The banana is unexpected and so tasty, it's like a fusion of a chewy oatmeal cookie and our favorite
banana bread. Enjoy!
Recipe: (makes ~24 cookies)
Ingredients:
2 Tablespoons coconut butter (you can find this on the health food aisle of your grocery store)
1/2 cup sugar
1/2 cup brown sugar
1 egg
1/4 cup banana (~1/2 of a ripe banana)
1/2 teaspoon vanilla extract
1/2 teaspoon cinnamon
1 cup Pamela's Gluten Free baking mix
2 cups gluten free oats
1/2 cup walnuts, chopped
1/3 cup semi sweet chocolate chips
Directions:
1. Preheat oven to 350'F. Cream the coconut butter, sugar and brown sugar together in a mixer on medium speed for 1 minute.
2. With mixer on medium-low speed add the egg, banana, vanilla extract and cinnamon and mix for another minute. Add the Pamela's GF Baking mix, oatmeal, walnuts and chocolate chips and mix with a spoon until combined.
3. Scoop 3 tbsp size scoops onto parchment lined air-bake cookie sheets and cook for 15 minutes or until lightly browned. Cool for 5 minutes on sheet then move to cooling rack. Enjoy.
...click here for the recipe!
My hubby made this amazing lemon yogurt cake for dessert after our Easter Dinner today. How fun to use lemons from our own little tree! The raspberries were a perfect compliment {I convinced him to arrange the raspberries on top, which I think turned out great} ;) Everyone loved it comparing it to a restaurant dessert. There's an awesome sugary glaze to pour over the top, which adds a extra layer of sweet goodness. Definitely a decadent treat. Enjoy!
Recipe: serves 10-12
Ingredients:
3 eggs
3/4 cup of butter at room temperature
1 1/2 cups sugar
zest of 1 1/2 lemons
1 1/2 teaspoons vanilla extract
1 1/2 cups nonfat plain yogurt
2 1/2 cups + 2 tablespoons Pamela's Gluten Free Pancake and Baking Mix
Glaze:
3 tablespoons fresh lemon juice
1 1/2 cups powdered sugar
Topping:
14 oz fresh raspberries

Directions:
1. Separate yolks from the eggs, reserve yolks in a small dish and add egg whites to the bowl of an electric mixer. Whip egg whites on high speed (using the whisk attachment) until stiff peaks form (~5-10 minutes), gently transfer to another bowl and set aside.
2. Cream the (room temperature) butter and sugar together in the electric mixer on high speed (using the paddle attachment) until combined and creamy, about 1 minute. Add in egg yolks one at a time at medium-low speed. Add lemon zest and vanilla.
3. Slowly add in 1/4 of the yogurt then 1/4 of the flour mixture and repeat, until all the yogurt and flour mix have been added and the batter is combined. Very slowly BY HAND fold in the whipped egg whites using a spatula to gently combine with as little stirring as possible.
4. Turn on oven to 350'F. Pour batter equally into two 9-inch cake pans. Level batter by gently shaking the pan back and forth. Let the batter rest in the pans at room temperature until the oven is preheated.
5. Bake at 350'F for 25-30 minutes or until it reaches an internal temperature of 190'F and a toothpick inserted comes out clean. Cool in the pan for at least 20 minutes.
6. To make the glaze mix the lemon juice and powdered sugar in a bowl with a whisk until the glaze is runny and creamy white in color.
7. Once the cakes have cooled for 20 minutes, carefully remove them from the pans and put 1/3 of the glaze between the two layers to help hold them together. Pour the rest of the glaze over the top of the stacked cakes. Place raspberries on top starting from the outside edge and working your way in until the top is covered.
...click here for the recipe!
My hubby was busy baking today! I love it when he bakes, not only because he makes delicious creations but because I really don't care for baking, much too specific for me. I like to play around with recipes, adding things and leaving things out and that just doesn't work with baking. Today's creation was this delicious cinnamon swirl coffee cake and it was fantastic!! Seriously people, this is on par with my favorite sour cream coffee cake I grew up eating and still love to make every Christmas Eve. You would never guess that it's gluten free and that it has been lightened up; another trait I love in a good baked item. If you aren't interested in gluten free, still try this one, I've listed the alternate ingredients to substitute. Enjoy, and let us know what you think!
Recipe: (serves 8-9)
Ingredients:
1 cup walnuts, chopped finely
1/4 cup sugar
1/3 cup brown sugar
1 Tablespoon cinnamon
The cake:
2 cups Gluten Free Baking and Pancake Mix such as Pamela's (or 2 cups all purpose flour)
1/2 teaspoon of baking powder (or 3 teaspoons baking powder if using all purpose flour)
1 cup sugar
1/3 cup butter
2 large eggs
1 teaspoon vanilla
1 cup nonfat plain yogurt
Directions:
1. Preheat oven to 350'F. For the cake: mix four, baking powder, and sugar together; cut in the butter. In a separate bowl beat eggs then mix in vanilla and yogurt. Stir dry ingredients into wet slowly and stir to combine.
2. For the filling: Mix chopped walnuts with sugars and cinnamon. Spray an 8"x8" glass dish with cooking spray and place half the cake batter in the dish and smooth to make an even layer.
3. Next, sprinkle 2/3rds of the filling mixture on top of the first layer of batter. Pour remaining cake batter in next and smooth carefully with a spatula. Finally, sprinkle the rest of the filling evenly on top.
4. Bake in a 350'F oven for 40-50 minutes. Cool for 5-10 minutes, serve warm.
...click here for the recipe!
This is a tasty sweet my hubby made. It was quite tasty and a great way to use up some extra apples. He made it gluten free by using a
gluten free flour mix but you can always use all purpose flour as well. This would be heavenly with a scoop of vanilla ice cream but we didn't have any so I settled for a dollop of whipped cream. Enjoy!
Recipe: (serves 6-8)
to make your filling
5 medium apples, peeled, sliced into 1/4″ thick slices
1/4 cup freshly squeezed lemon juice
3 Tablespoons brown sugar
1/3 cup sugar
1 1/2 teaspoons cinnamon
1/2 cup gluten free flour mix – you may need to add a bit more if your apples are especially juicy.
to make your topping
6 Tablespoons cold butter
1/3 cup gluten free quick cooking oats
1/2 cup gluten free flour mix
1/4 cup sugar
2 Tablespoons brown sugar
1 1/2 teaspoons ground cinnamon
1/2 teaspoon ground nutmeg
Directions:
1. Preheat oven to 375'F.
2. Peel and thinly slice apples and place in a large bowl, drizzle with lemon juice and stir to mix. Add flour, sugar, brown sugar and cinnamon and stir to combine, pour it all into 8"x8" glass baking dish. The mixture should be a sticky paste consistency that coats the apples.
3. In another bowl cut together cold butter, oats, flour and sugars using two forks or a pastry cutter, until it's well mixed and crumbles. Sprinkle topping mixture over apples and press down lightly to cover all the apples.
4. Bake for 25-30 minutes or until topping is golden brown and internal temperature is 200'F. Serve warm.
...click here for the recipe!
Okay, so this is not really a healthy dinner idea, it's a fun treat idea. It's our turn to bring snack to Preschool this Thursday, which happens to be Saint Patrick's Day so I decided to try this fun idea I got from my friend G. I think they turned out pretty cute. Stay tuned tomorrow for a super healthful St. Patrick's themed snack perfect for kids and adults alike, I'll give you a hint, it's very colorful.
Pretzel Shamrocks:
- 1 large bag mini pretzels (get a good brand like Snyder's so they don't fall apart)
- 1-2 bags Candy melt chocolate (you can find this at most craft stores)
- sprinkles!
Directions:
1. Melt your candy melts in a double boiler (small glass bowl over a pot of gently simmering water).
2. Dip small end of pretzels in melted candy chocolate

place three pretzels end to end together to make a cute little shamrock! Save the broken pretzel pieces for stems. Attached your stems with a dab of melted chocolate.

3. Once the candy has set on the pretzels, place the remaining melted candy melts in a zipper top plastic bag, squeeze out all the air and snip a very tiny (I mean VERY tiny) corner off the bag. Use this as a piping bag to pipe your candy melts all around the edges of the pretzels. Then sprinkle lots of sprinkles while the chocolate is still wet.
4. Once completely hardened (~1 hour), store in an airtight container for up to 1 week.
...click here for the recipe!
disclaimers
NOTE: The information on wholesomedinnertonight.blogspot.com is compiled from a variety of resources and is presented for educational purposes only. If you have questions or concerns regarding your physical or mental health, please seek assistance from a qualified healthcare provider.
Although this site includes links providing direct access to other Internet sites, wholesomedinnertonight.blogspot.com has not participated in their development, and does not monitor or exert any editorial control over these sites. Please review each website for their own privacy information.
Recipes listed as gluten free assume you are using gluten free ingredients when sauces or chicken stock, etc is listed. wholesomedinnertonight.blogspot.com has no control over where you get your ingredients, and which sources/brands of individual ingredients are used in your cooking. Thus we cannot guarantee that the end product you create will be gluten-free.


