Looking for a warm and hearty stew to make in the slow cooker? This one is super tasty and the kids loved it. You can also use a beef chuck roast, which I have done when they go on sale two for one at the grocery store. Additionally, you can always add other vegetables such as carrots, parsnips or turnips. Serve this up with some of our
gluten-free biscuits on the side and enjoy!
I'm linking up with Jo-Lynne's, Gluten Free Weekly Meal Plan over at Musings of a Housewife

Recipe: (serve 4 or if you use more meat up to 6)
Ingredients:
1-1.5 pounds Beef stew meat, very lightly salted (or you can also use a beef chuck roast 1 1/2-2 pounds - no need to cube it)
2 tablespoons White Rice Flour
6-8 small (lime sized) golden or red potatoes, leave whole (half if larger)
3-4 stalks celery, sliced
1/2 white onion, sliced into large chunks - Save the other half of the onion using this trick
1 teaspoon Italian Seasoning
1/2 teaspoon dried thyme, rolled gently between fingers to release the oils
1/4 teaspoon garlic powder
1 teaspoon salt
5 1/2 - 6 cups water
8 oz whole, baby Bella mushrooms, rinsed
--------------------------------
2 tablespoons white rice flour
1/3 cup water
Directions:
1. Heat a large pan over medium high heat, add beef cubes and begin to brown on all sides, about 2-3 minutes.
Sprinkle beef with about 2 tablespoons of white rice flour and flip to coat all sides and continue browning about 2-3 minutes more. We're looking for nice browning on the meat, not cooked through.
2. While meat is browning, add potatoes, celery, onion, Italian Seasoning, thyme, garlic powder and salt to the slow cooker.
3. Once meat is browned on both sides, remove from pan and add to the slow cooker on top of the vegetables. Add about 1/2 cup of water to the hot pan and deglaze it, gently stir up all the yummy bits from the bottom of the pan.
After about 1 minute, pour the liquid from the pan over the meat.
4. Arrange mushrooms over top of the meat. Add additional 5 - 5 1/2 cups of water, or until meat is nearly covered in water.
5. Cook on low for 8-10 hours. About 1 hour before serving, combine 2 tablespoons rice flour with about 1/3 cup of water and add mixture to the slow cooker to thicken your sauce. Season to taste. Serve hot with some gluten-free biscuits on the side.
{Make ahead} For those days you know you will be busy, even too busy to brown the meat for the slow cooker...Follow all the directions through number 4, place lid on the slow cooker and refrigerate overnight. If your slow cooker does not have a silicone seal, you may want to cover it with plastic wrap before putting the lid on to prevent your fridge from smelling like onions. The next day pull the slow cooker out of the fridge about an hour before you plan to start cooking, then turn it on and cook as per #5 above.
*this post contains affiliate links
...click here for the recipe!
We had company over for dinner last week and I made brownies for dessert. I wanted to be sure my hubby had some kind of dessert as well. These turned out more like a chocolate bread than a super sweet brownie, which is great for those that don't like a lot of sweet. They have a good texture and a great cocoa flavor. If you are okay with chocolate chips, I think a few sprinkled on top of the batter before baking would really be a nice sweet touch. The plate was empty by the next day and the kids enjoyed them too.
Recipe (makes about 9-12 squares)
Ingredients:
1 cup Organic Creamy Almond Butter
1/3 cup Organic Agave Nectar
1 egg
1 teaspoon good quality Vanilla
1/3 cup Cocoa Powder
1/2 teaspoon baking powder
Directions:
1. Preheat oven to 350'F. In a mixing bowl combine wet ingredients; almond butter, agave, egg and vanilla.
2. Slowly add the dry ingredients to the wet, stir to combine.
3. Bake in a greased 8"x8" glass baking dish at 350'F for 20-22 minutes until set and sides begin to pull away form the glass..
4. Let cool then slice into squares and serve.
*this post contains affiliate links
...click here for the recipe!
We've made the move from California to Michigan and in the middle of January no less. Let's just say the weather is very different. Aside from being snowed in a few days, we are loving it! It's been such a fun experience so far. We are hopefully going to close on our house this week and be able to move in soon. Once we're unpacked and settled I plan to do some more recipe testing and more posting here. For now, I leave you with our weekly menu, filled with warm comfort foods. Check out the links below for lots of great meal time inspiration.
SUNDAY:
Spinach Rice Casserole with green salad
MONDAY:
Tostadas
TUESDAY:
Chicken and Rice Soup
WEDNESDAY: Pizza night while Daddy works late; I usually add a few fresh toppings to a frozen pizza for me and the boys
THURSDAY:
Corn Flake Crusted Chicken with Broccoli Mashed Potatoes and salad
FRIDAY:
Pumpkin Chili with
gluten-free Cornbread
SATURDAY:
Chicken Vegetable Stir-Fry
Menu Plan Monday at orgjunkie.com
...click here for the recipe!
Quiche is such a warm and satisfying dish and hearty enough to stand alone as your main entree. We had this delicious quiche as our Christmas Eve dinner this year but it can work anytime of year. We are in the process of preparing to relocate from California to Michigan and packing during the holidays meant this year had to be sweet and simple. My hubby eats gluten free and since we eat dinner together as a family, our dinners are gluten free also. Growing up my Grandma Oma ate gluten free and she loved this thin potato crust. This was my first time making it and it was really easy! My hubby also eats dairy-free so I just added some cheese to half of the quiche. You can add cheese to the filling if you prefer and certainly can have fun playing with swapping out the fillings. I'd like to try a sun dried tomato, spinach and goat cheese combo next. I'm also thinking of trying these in a cupcake pan for a tasty appetizer! Merry Christmas and Enjoy!
Recipe: {serves 4 as main dish, 6 as a side}
Ingredients:
2 medium Russet potatoes, peeled
1 cup cooked spinach
2-3 ounces Canadian bacon diced
1 clove garlic, finely minced
1-2 tablespoons diced red onion
4 eggs, well beaten
3/4 cup milk or water
1 tablespoon avocado oil (or other cooking oil)
Directions:
1. Using a Mandolin, thinly slice the peeled potatoes. Or use a knife if you don't have a Mandolin.
2. Drizzle 1/2 tablespoon oil in bottom of a glass pie plate. Layer potato slices all over bottom and sides of pie plate, slightly overlapping each slice.
3. Bake potatoes at 425'F for 25 minutes.
4. In a saute pan add 1/2 tablespoon oil and diced Canadian bacon and saute over medium heat for 5-10 minutes or until golden and fragrant.
5. Add garlic and onion and stir to saute. Once onions and garlic are tender, add in cooked spinach to warm through. Remove spinach mixture from the heat and allow to cool slightly.
6. In a large bowl mix together eggs, milk (or water), and cooled spinach mixture (if it's too hot it will scramble your eggs).
7. Remove potatoes from the oven and decrease oven temperature to 375'F. Pour the egg and spinach mixture over the potatoes, smoothing evenly with a spatula.
8. Bake at 375'F for 30-40 minutes or until eggs are set. Remove from the oven and let sit for 5-10 minutes before serving. Top with cheese if you like.

*If you are a cheese eating family, go ahead and add a palmful of your favorite cheese to the filling!
For Diabetic Friendly, consider substituting Egg Beaters for the eggs for 1 CHO exchange, 3 Protein exchanges and 1.5 fat exchanges
...click here for the recipe!
It's almost officially Autumn! Yay for warm soups, stews and delicious slow cooked dinners...my favorite. Seeing all the fresh squash in the market inspired me to make some tasty Butternut squash soup. My hubby eats gluten-free and dairy-free so I was inspired to create a creamy textured soup without the cream. An updated version of
this. This soup, with it's roasted fall flavors and a subtle sweetness from the squash, is a hearty and filling choice for dinner tonight. The slow cooker will do most of the work for you. Enjoy!
Recipe: (Serves 4-6)
Ingredients:
2 butternut squash (or 1 large squash)
1 large onion, chopped
3 celery stalks, chopped,
olive oil,
3 cloves garlic, finely chopped,
1 teaspoon poultry seasoning
1 1/2 teaspoons dried thyme
6-7 small red potatoes, quartered
6 cups water
1 1/4 teaspoons salt
salt and pepper to taste
*My hubby has also figured out that he has an allergy of sorts to carrots (via ALCAT) so I have left them out when I would have normally added them to create a Mirepoix. I also can't use store-bought stocks anymore (because they contain carrots). You can use homemade stock if you have it on hand or store-bought vegetable stock, just adjust the salt accordingly.
Directions:
1. Preheat oven to 350'F. Slice butternut squash in half lengthwise and place cut side down in a large glass baking dish and fill with about 1 inch of water. Bake @ 350'F for 20-30 minutes until cooked through (easily pierced with a knife)
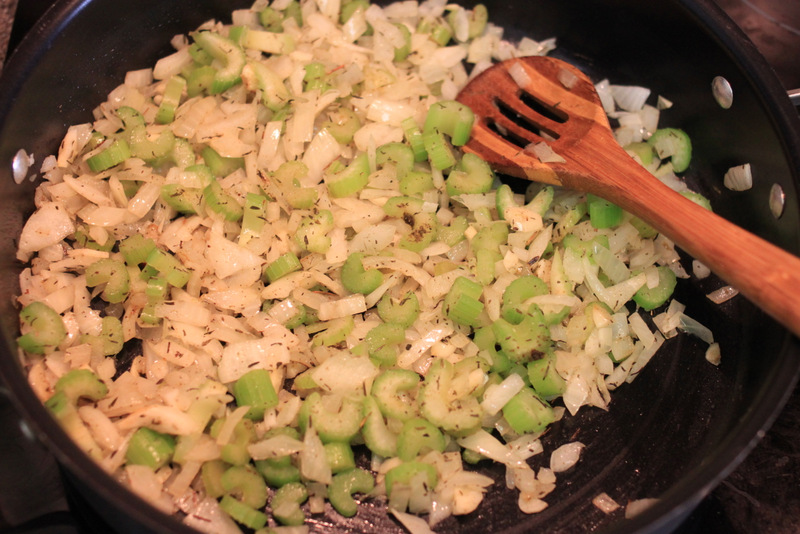
2. In a large saute pan over medium heat add about 1 tablespoon olive oil. Add diced celery, onions and garlic. Saute over low-medium heat for 10 minutes until fragrant and soft.
3. Add in poultry seasoning, thyme and salt and stir to combine and lightly toast spices to bring out their flavor. Add celery, onion mix to the slow cooker.
4. Wash and quarter potatoes and add them to the slow cooker. Add 6 cups of water to the slow cooker.
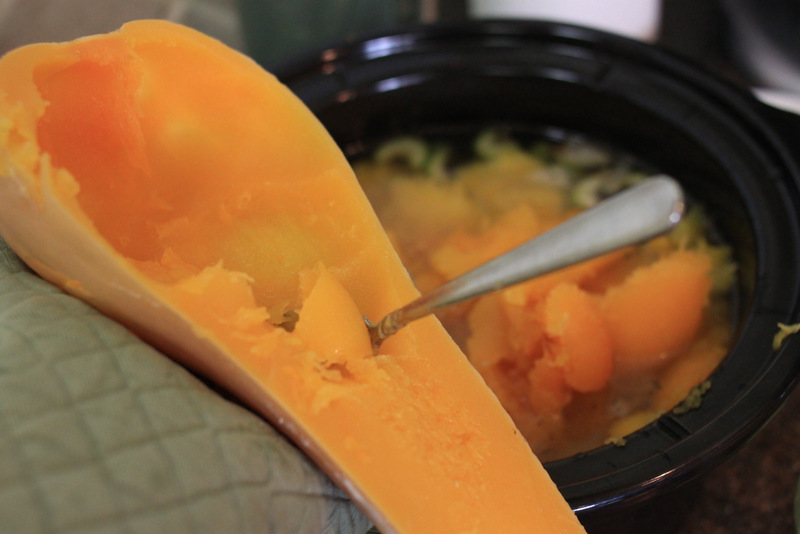
5. Once the squash is cooked through, remove from oven and allow to cool for 15 minutes. Carefully handle the squash with an oven mitt and scoop out the soft orange flesh with a spoon. Add it to the slow cooker.
6. Cook on LOW heat in the slow cooker for 4-5 hours. Turn off heat and blend soup using an immersion blender or working in batches blend soup in a blend or food processor until smooth. Season to taste with salt and pepper and serve with a bright green salad. We added some tasty sprouted pumpkin seeds for a crunchy bite.
...click here for the recipe!
This is a great way to enjoy crispy tortilla shells at home made from nothing more than simple corn tortillas. Nothing added, no added preservatives to keep them crispy in a box. And guest what? It's super easy. We use these crispy shells whenever we have tostadas, crispy tacos or simply want some warm, fresh chips! Enjoy!
Ingredients:
fresh organic corn tortillas
Directions:
1. Preheat oven to 350'F.
2. Place tortillas directly on oven rack, with enough space so that they are not overlapping
3. After about 5-7 minutes, flip them all over
4. When you start to smell a nice toasty corn smell they are done, about 5-7 minutes later. The first few times you make your homemade crispy shells you'll want to stay nearby the oven and watch them until you are comfortable with your oven and figure out the time that works for you. *All ovens are slightly different.
*To make taco shells, simply shape the tortilla into a taco shape and drop in between the oven rack grates.
...click here for the recipe!
disclaimers
NOTE: The information on wholesomedinnertonight.blogspot.com is compiled from a variety of resources and is presented for educational purposes only. If you have questions or concerns regarding your physical or mental health, please seek assistance from a qualified healthcare provider.
Although this site includes links providing direct access to other Internet sites, wholesomedinnertonight.blogspot.com has not participated in their development, and does not monitor or exert any editorial control over these sites. Please review each website for their own privacy information.
Recipes listed as gluten free assume you are using gluten free ingredients when sauces or chicken stock, etc is listed. wholesomedinnertonight.blogspot.com has no control over where you get your ingredients, and which sources/brands of individual ingredients are used in your cooking. Thus we cannot guarantee that the end product you create will be gluten-free.